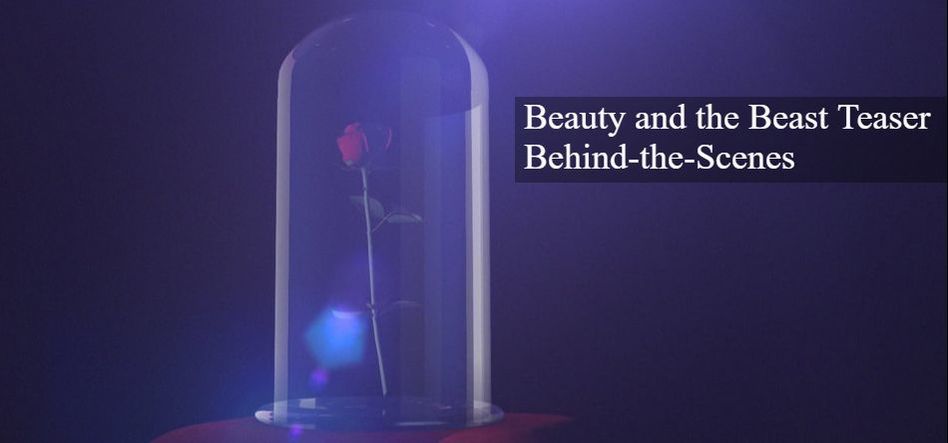
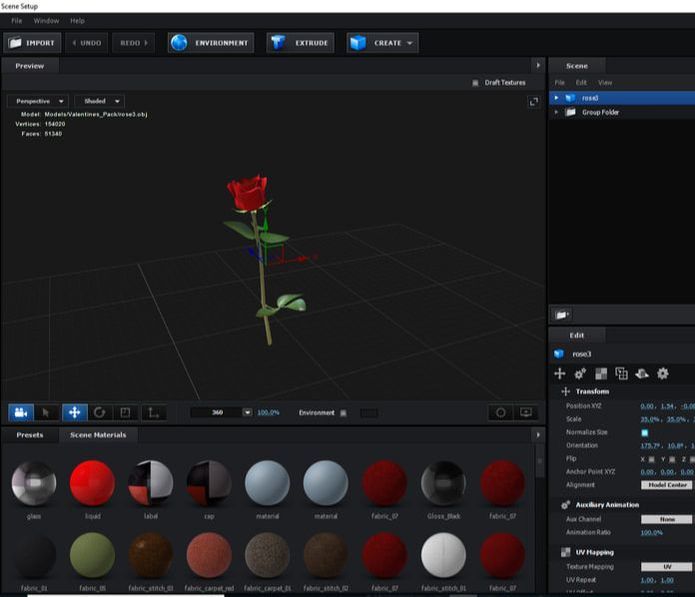
 Meant to get this post out last week, but I was sick and work got really busy. So lets jump in - NAB is now long behind us, and as usual I jumped right into something new as soon as I was back in town. This year, it was the teaser trailer for Clear Creek Community Theatre's production of Beauty and the Beast. If you haven't seen it yet, check it out before we go any further: So I made this teaser entirely in Adobe After Effects using Video Copilot's Element 3D plugin (along with some other plug-ins), lets start by breaking down the pieces at play here: The idea came to me when I was thinking about the trailer for the recent film, and how they focused on the rose - I was wishing that the prop and set had been available to film practically to use as a teaser, but we needed something faster. I started digging around in my 3D models and realized (with a little creative thinking) that I had everything I needed to make the scene: a rose, a cylinder, a doughnut shape, a fabric drape, and a bullet. All of these came from a combination of free and paid for model packs from Video Copilot. 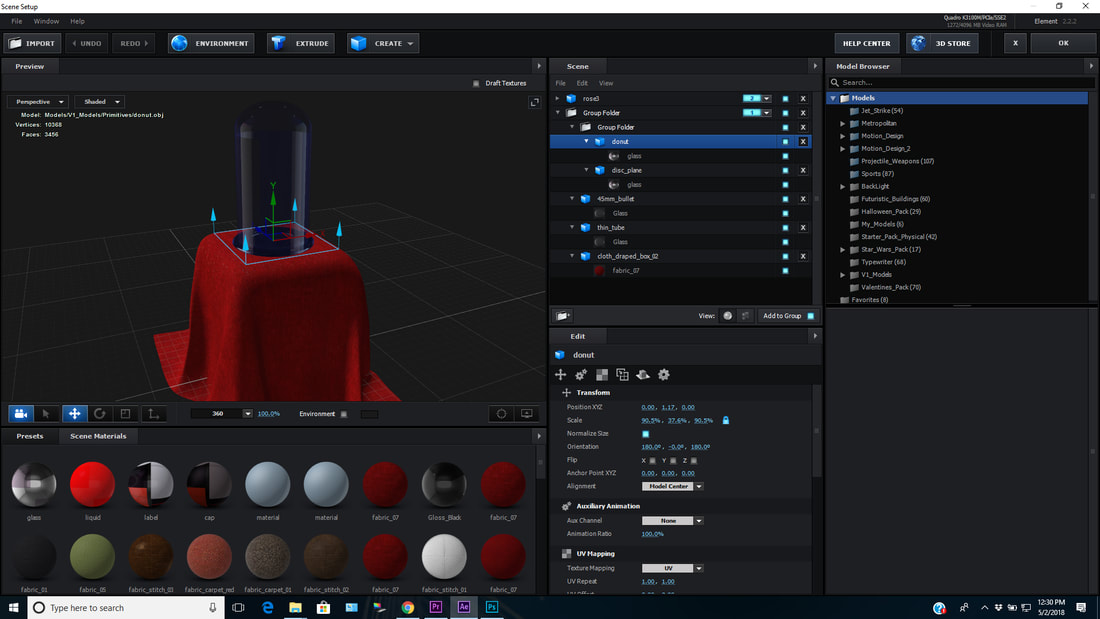 Here you can see all the different models I had in the scene. The thing you have to realize when thinking about simple 3D models is that they're (usually) not solid - a bullet isn't a bullet, its a hollow bullet shape with a brass texture, so when I swapped the brass for a transparent, glass-like texture, and deformed it a little bit, the .45 caliber bullet became the glass dome for the case that the rose hangs suspended in.
The next step was to animate that camera move - a relatively easy task since I wasn't actually animating the model, simply moving the camera around as I would have if I were shooting it in a real life setting. Because it all works within After Effects, the built in "camera" is pretty intuitive and easy to move around, and once you wrap your head around it, feels pretty similar to using a real camera. (with a few exceptions that'll drive you nuts until you figure them out) 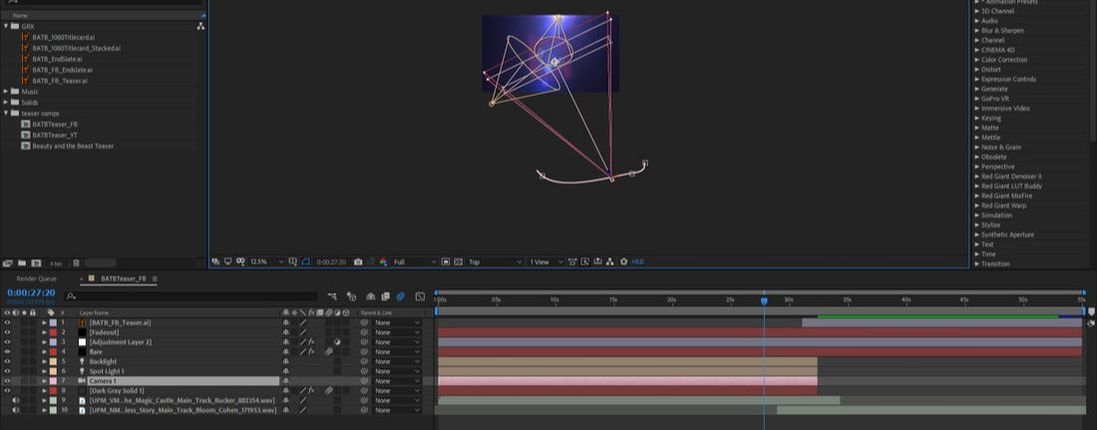 You can see some of the camera track, as well as the lighting in this screen capture. Once I was happy with the camera move itself, I needed to set the keyframes for the focus points - this is where the computer camera gets a little interesting to work with from time to time, as it uses pixel depth, instead of a real world measurement for the focus. I wanted to start the piece out with a really shallow depth of field, partially to take the curse of off the imperfections in the rose, but also because it was part of "the look" I wanted for this. Of course once the camera zoomed out, it wasn't as necessary because I didn't have any detail in the background. But I still had to make sure focus was locked on the rose, and unfortunately this couldn't be tracked automatically (at least not with any method I'm aware of - if someone knows of an "autofocus" button in After Effects, PLEASE TELL ME!), so I was tracking the focus by hand throughout - setting and adjusting keyframes every 5-10 frames by the time all was said and done. 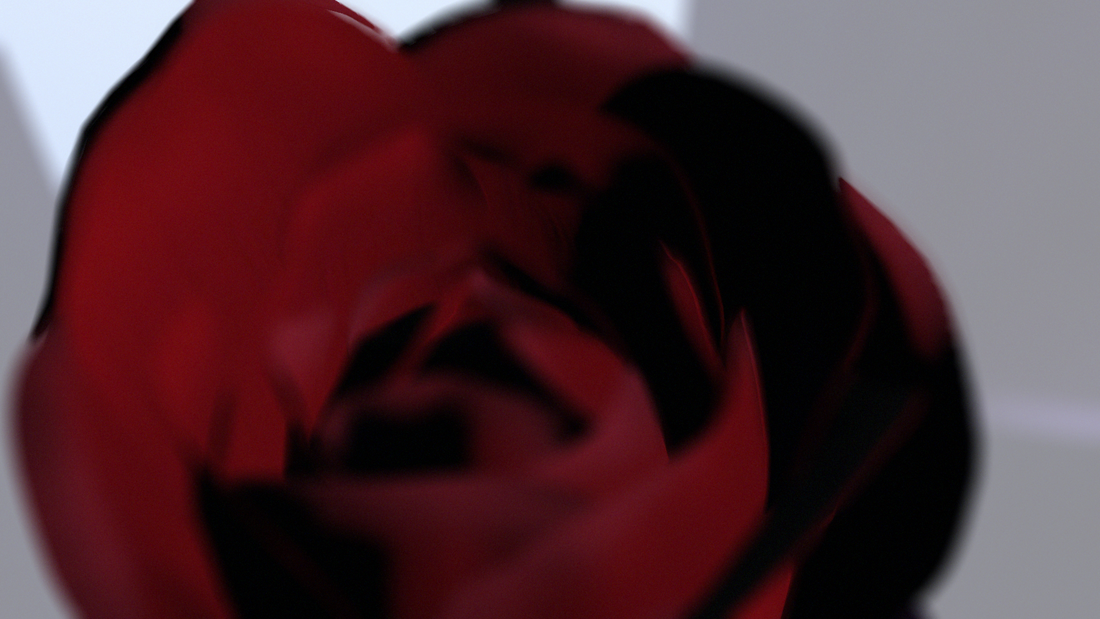 Super shallow depth of field with a super close shot of the rose at the beginning of the teaser. After that was settled, the next step was lighting. Lighting makes the difference between bad 3D and good 3D every time - you can have the prettiest, highest quality model imaginable, if its lit poorly, it will look wrong. And because element 3D plays so nicely with After Effects, lighting was also relatively painless, and not too different than lighting in reality. I set a keylight, and a backlight, and let the "invisible" environment add the fill and highlights to the glass, and moved them around until I had the look I wanted. That almost finished it, but the problem is the 3D lights only show the light they throw on the model - you can't "point the camera at it" and get a lens flare, and I felt like that was what this was missing. Luckily for me - another Video Copilot plugin had me covered on that front - Optical Flares: 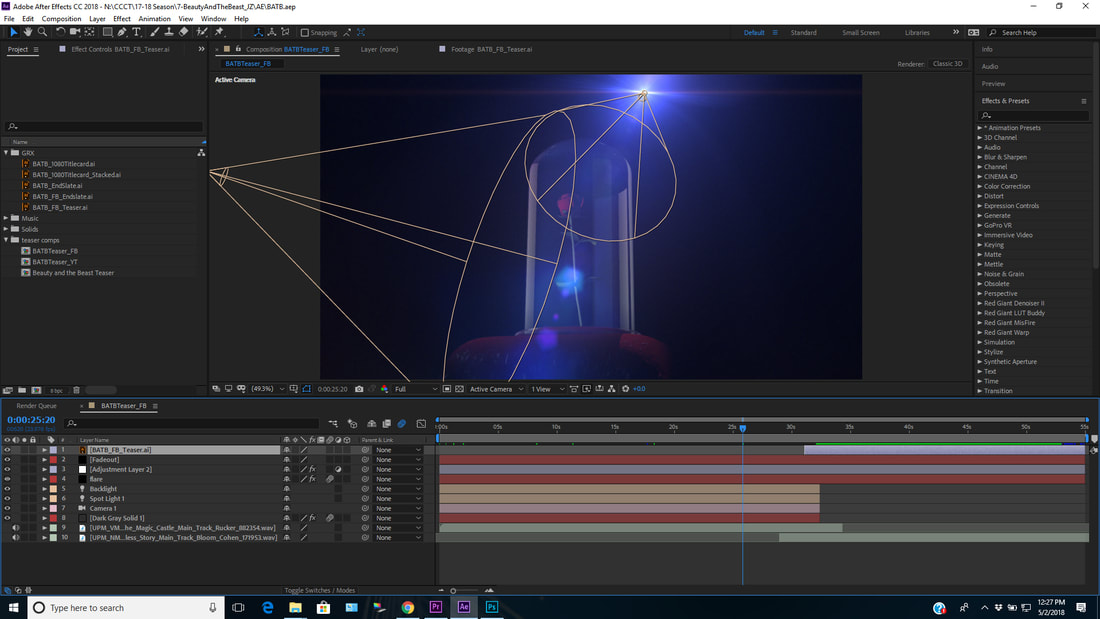 Here you can see the flare I chose tracked onto the backlight Once I chose the flare I liked for this piece (a surprisingly difficult and incredibly subjective task) the next step was to track the lens flare onto the light itself. Thankfully, I did not have to do that by hand, as there's a setting to map it to the lights. At this point, everything was still behaving mostly as it would in reality - the camera moves around the rose, and the lights stay the way there were in relation to "the set". And when the camera gets pointed at the light, there's a lensflare that very naturally fades in and out of the scene. All that was left was to adjust the lens flare so that it reacted to shining "through" the glass, even though it was technically "on top" of it. That was a simple matter of adjusting the intensity for those moments. However when I played it back somethsing still felt off. It felt "too clean" which is another downfall of "bad" 3D - so in order to make it look more like something that was "filmed" I put a very subtle blur on top of everything, and then added a film grain on top of that. 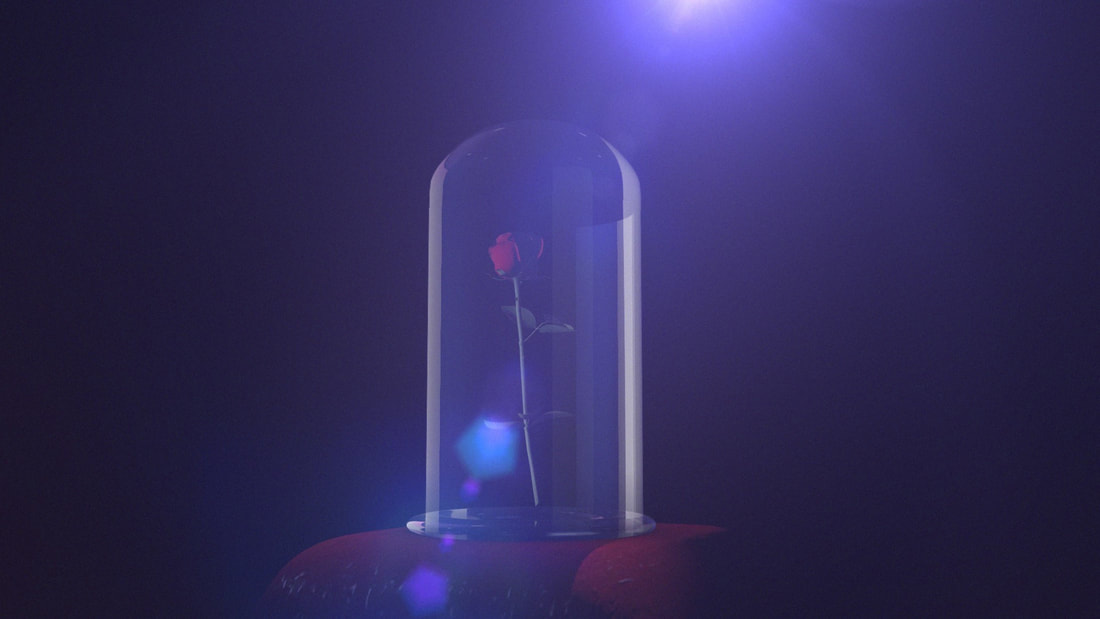 I was particularly happy with how well the film grain took the highlights from the lens flare With the video itself "finished", the next step was to choose some music that worked for it - thankfully the Killer Tracks library had me covered with some very good "sounds like" music. And then to wrap it all up, I slapped the show graphic on the tail end, and that was it - one more relatively simple, but nice teaser trailer done for the theatre. And there you have it - that wraps things up for this week's post. As always, thank you for reading and I hope you found it interesting. If you're in the area and would like to see Clear Creek Community Theatre's production of Disney's Beauty and the Beast, you can buy your tickets online here, or just call the theatre (phone number is available on their website) to make a reservation. Seats are selling out quickly. Also, just to let you all know, I'm probably going to skip the next week or two worth of posts - as many of you know, a significant part of my "day job" at TPC involves live support for news stories out of Houston, and the tragedy in nearby Santa Fe has us all very busy. The studio has been in use almost non stop and we had a photographer with our LiveU pack down in Santa Fe all weekend and into the beginning of this week. And on top of all that, I've finally started digging into post production on The Getaway, a short film I started shooting in 2014, finally wrapped in 2015, and I've left it sitting on my hard drives ever since, so I'm going to spend some time trying to push ahead with that. Once I get a little further into that, expect to see some behind the scenes/in progress posts on that project. In the meantime, be sure to follow me on Twitter and Instagram: @tomameek to get updates on what I'm working on. And feel free to let me know in the comments below if you want to know a little more about any of my posts, or if you'd like me to do a similar "behind the scenes" post on any of my past projects, most of which can be found on my YouTube channel. Until next time, -Thomas 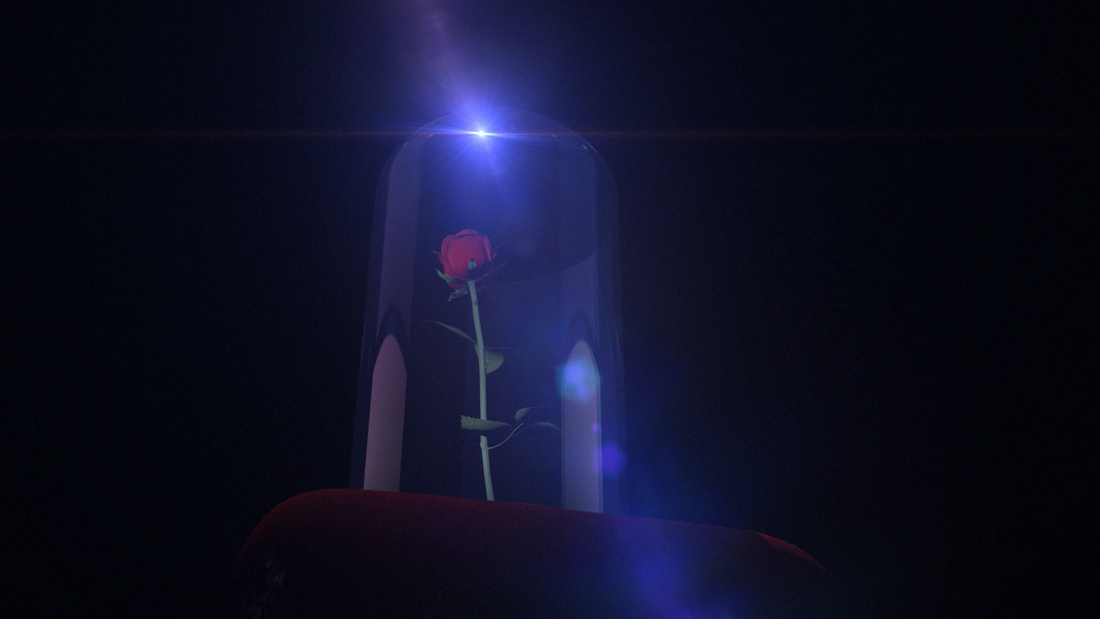 Bonus screenshot of the finished piece, just because it looked cool |
AuthorThomas Meek is an independent filmmaker living and working in Houston, TX Archives
March 2021
Categories
All
|
 RSS Feed
